This tutorial will show you how to use the gradient tool in Photoshop
This tutorial assumes you already have your picture open in Photoshop
1) Right click on the paint bucket in the toolbar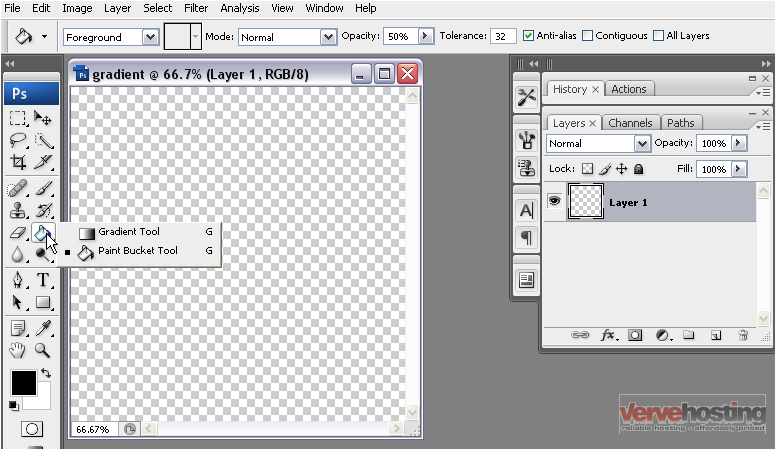
The gradient tool allows you to fill an area with a range of colors in a specified pattern
2) Select the gradient tool
3) Now, click and drag your mouse from one point in the image to another
4) You can change the colors of your gradient or select a preset here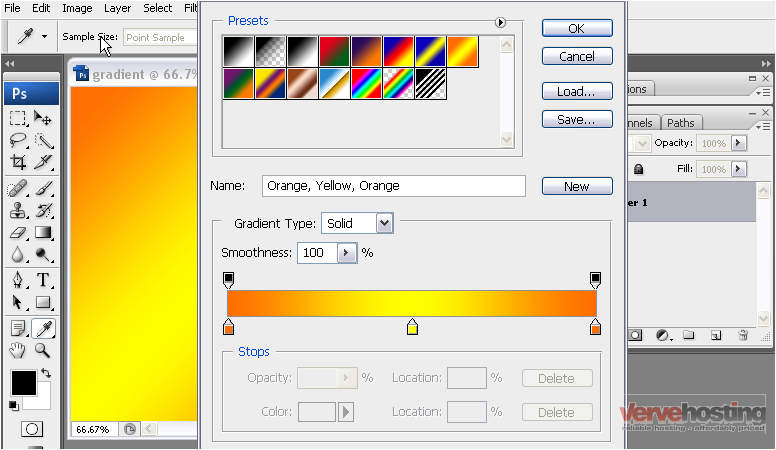
Notice, Photoshop has filled the image with color using the currently selected preset
5) Select a preset from the list
Each stop represents a different color that you can change to affect the overall look of the gradient
6) Click on the color…
7) …and select a different shade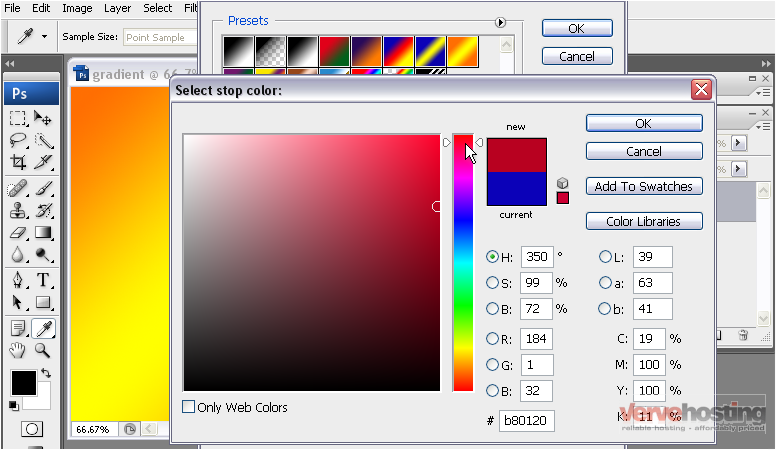
8) When you are finished, click OK
9) You can also add a stop by clicking in any of the empty space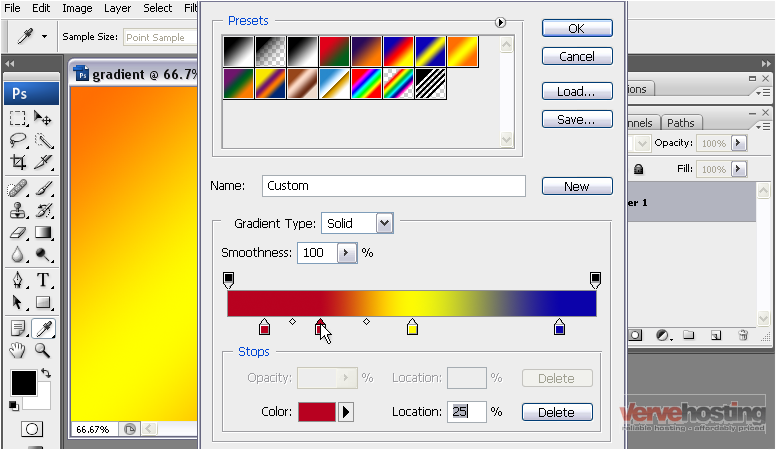
10) Drag the stops to move colors closer to each other in the gradient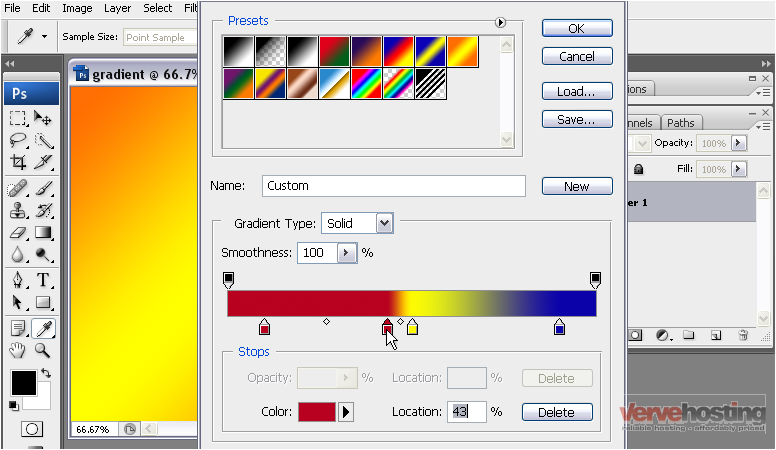
11) To delete a stop, select it and click Delete
12) You can re-name your gradient here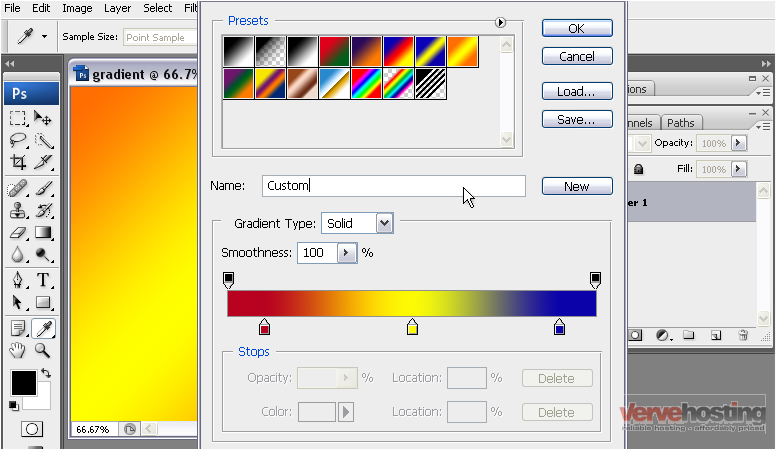
13) Click New to add it to the list of presets
Your gradient now shows up in the list
14) To save the list of gradients, click the Save button
15) Enter a name for the gradients, then click Save
16) To load a list of gradients, click the Load button
17) Select the gradient list you wish to load and click the Load button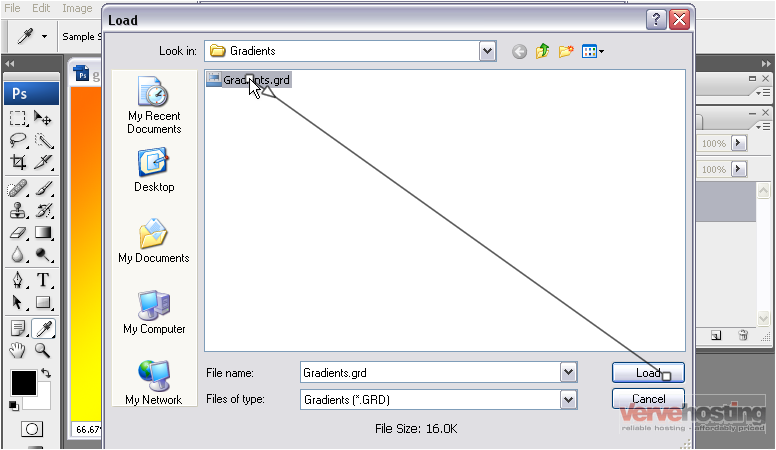
The gradients have been appended to the existing list
18) You can delete a gradient by right clicking on it…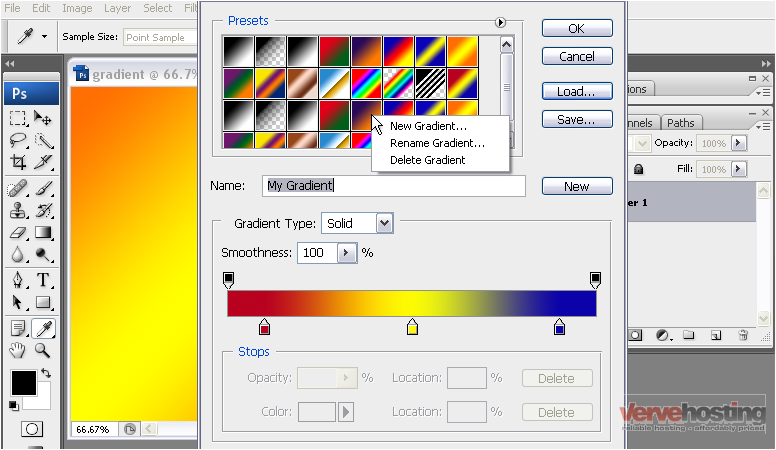
19) …and selecting Delete Gradient
20) The gradients can be reset at any time by going to the menu…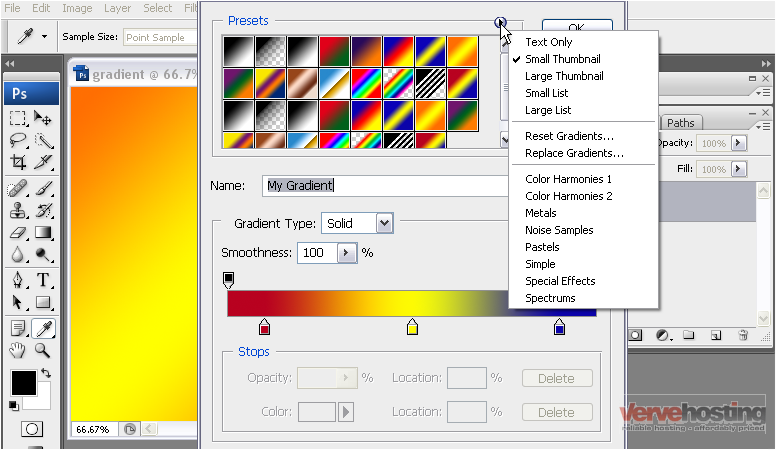
21) …and selecting Reset Gradients
22) Click OK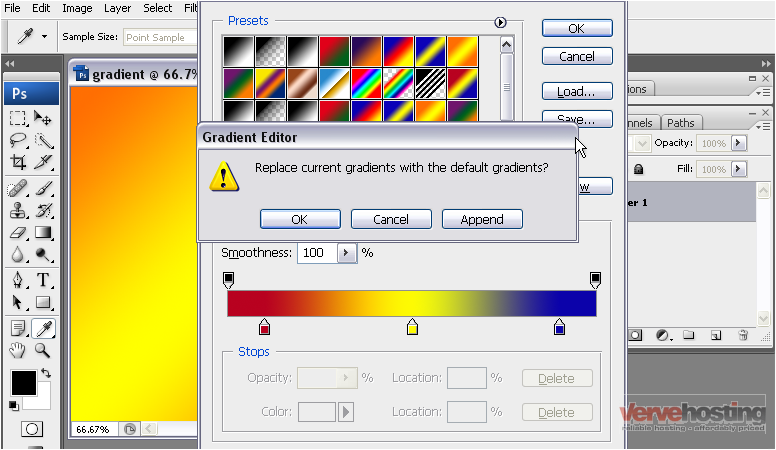
You will have the option to save your gradients
The default gradients have replaced the previous list
If you wish to load a set of saved gradients without appending them to the list, you will need to replace them
23) Go to the gradient menu…
24) …and select Replace Gradients
25) Select the gradient list you wish to load and click the Load button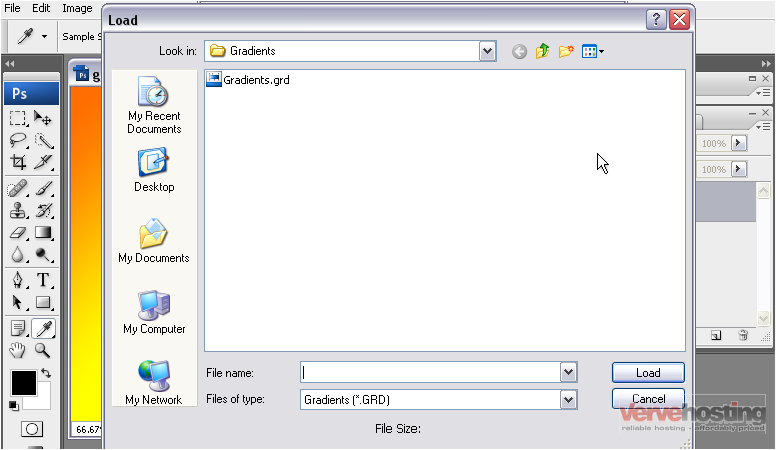
Photoshop also comes with its own list of gradients
26) Select one from the list to load the presets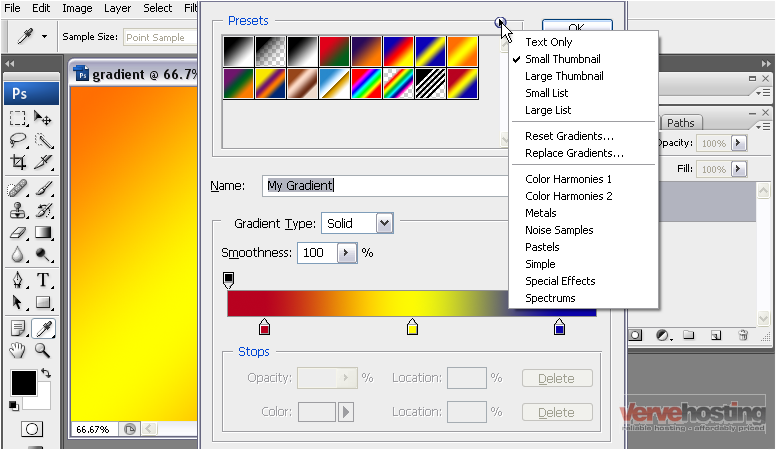
27) Click OK
The gradients have replaced the previous list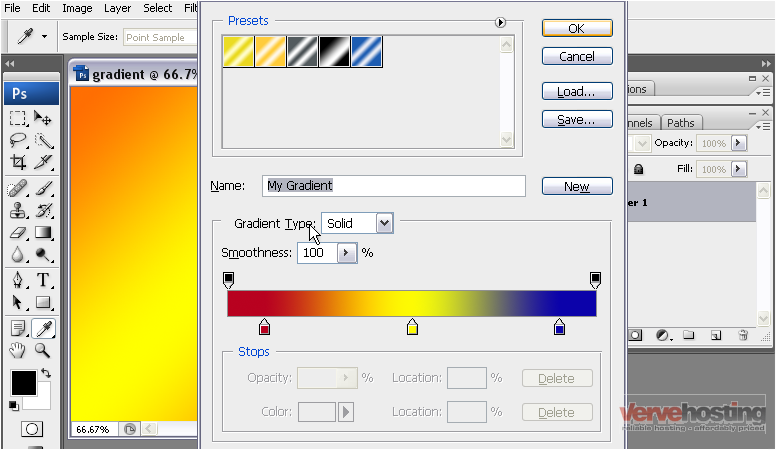
28) Click OK to close the gradient window
29) We will select the radial gradient
There are several styles of gradients to choose from including linear, radial, angle, reflected, and diamond
30) Click and drag your mouse from one point in the image to another
Photoshop has used your settings to apply a radial gradient
You can also set the opacity of a gradient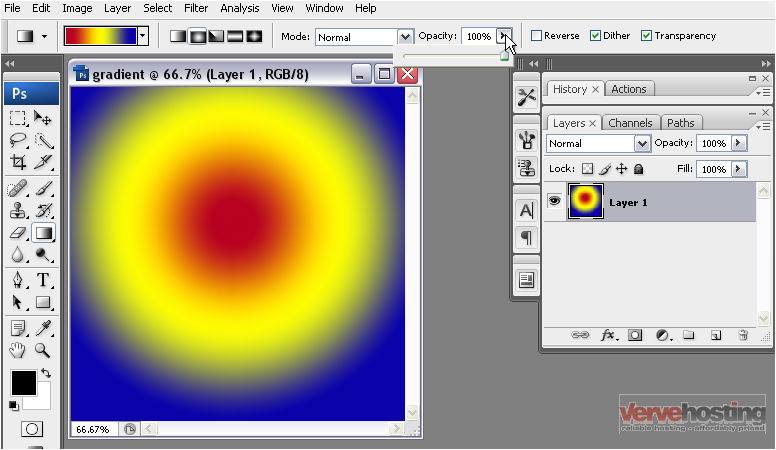
31) Adjust the slider to the desired value
32) You can also reverse the order of a gradient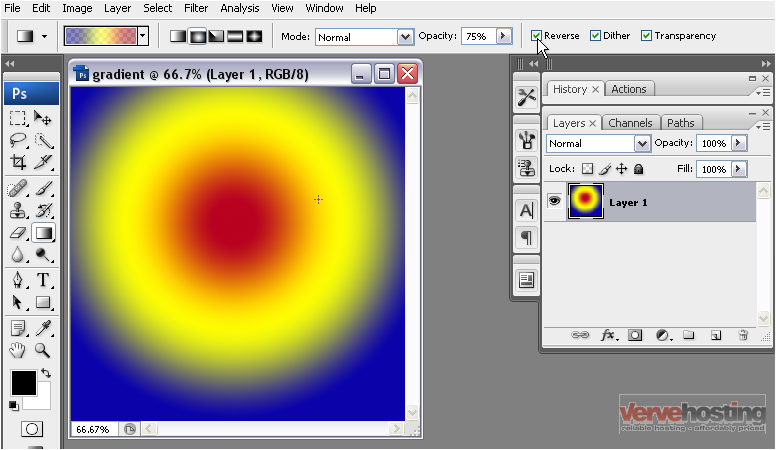
33) Now, drag your mouse from one point in the image to another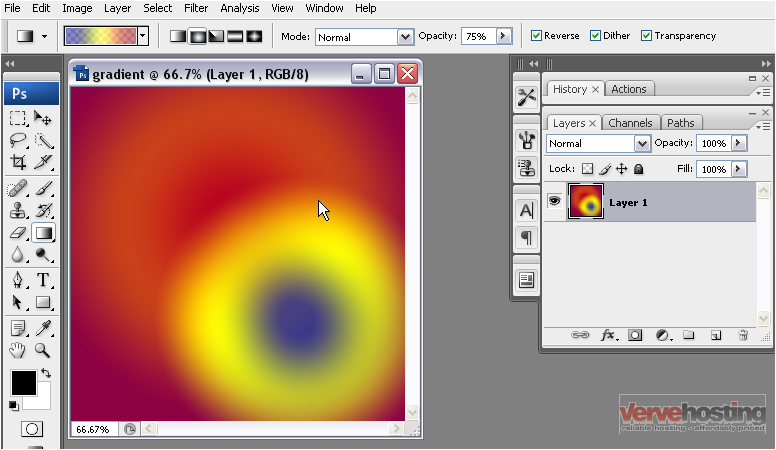
Notice that the blue color is now in the center instead of red. Also, the last gradient is visible under the new one
This is the end of the tutorial. You now know how to use the gradient tool in Photoshop
