If you have a domain name that is currently hosted with us, you can make DNS changes in the cPanel for that domain under Domains ==> Zone Editor
If you purchased a domain name that will not be hosted with us and need to create DNS records, follow these instructions:
1. Log into the Client Area at https://cms.vervehosting.com/clientarea.php.
2. Click the box labeled "Domains."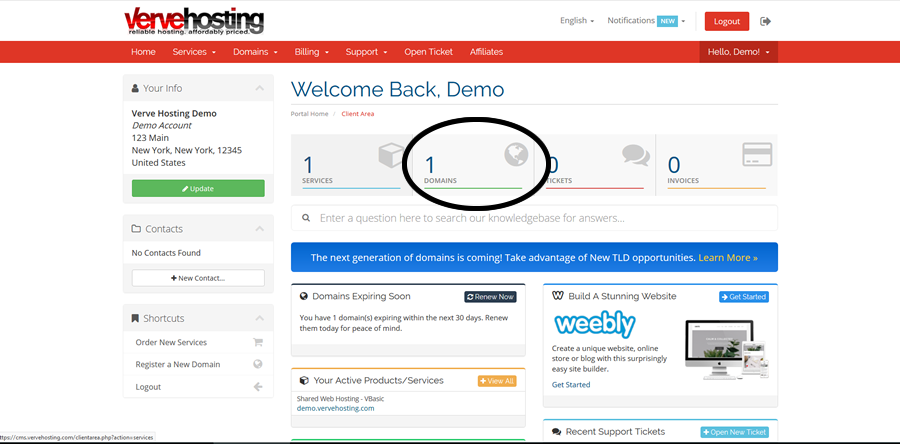
3. Click the button labeled "Active" in green text for the domain you want to modify.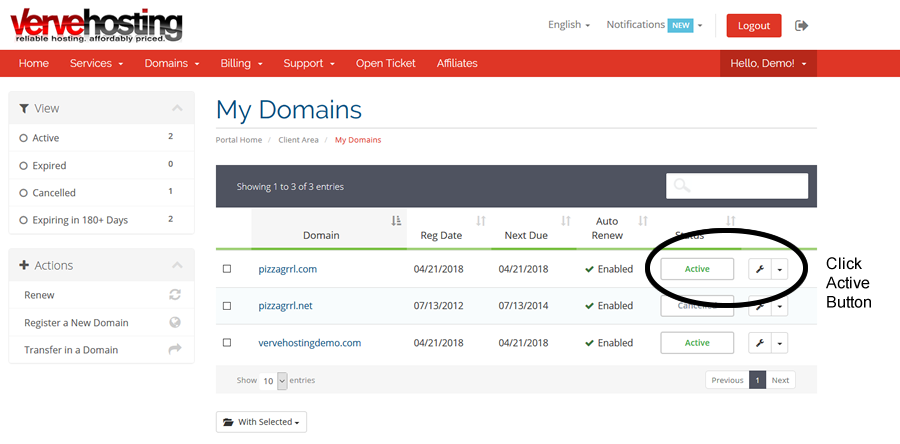
4. Select "Nameservers" from the menu on the left side of the screen.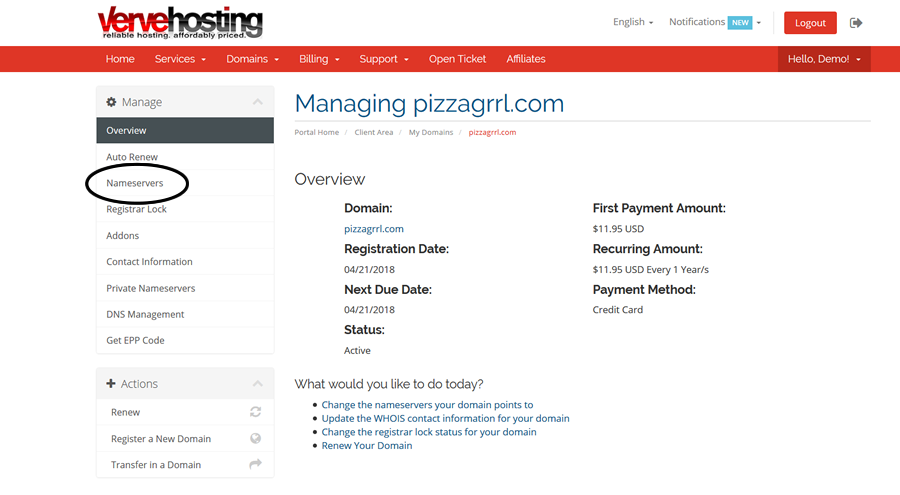
Select the option to use custom nameservers and change the nameservers for your domain to the following:
DNS1.name-services.com
DNS2.name-services.com
DNS3.name-services.com
DNS4.name-services.com
DNS5.name-services.com 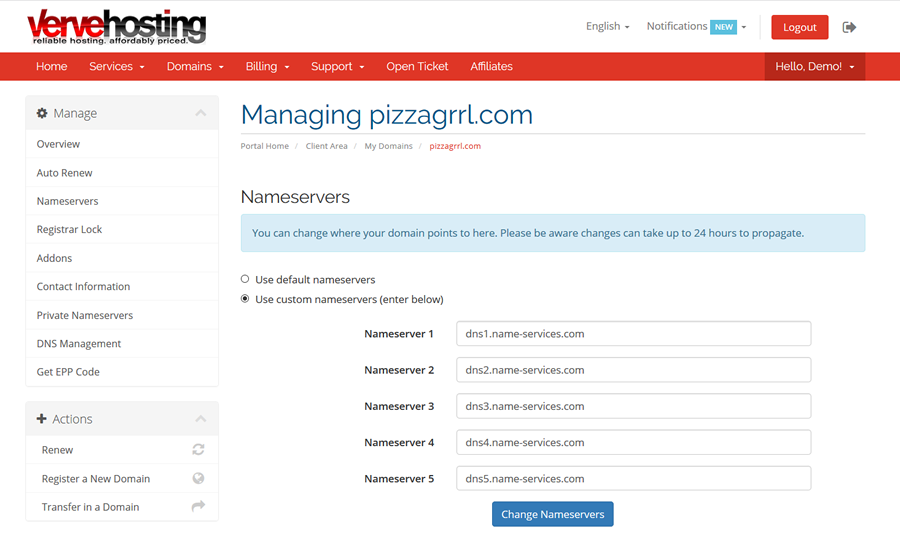
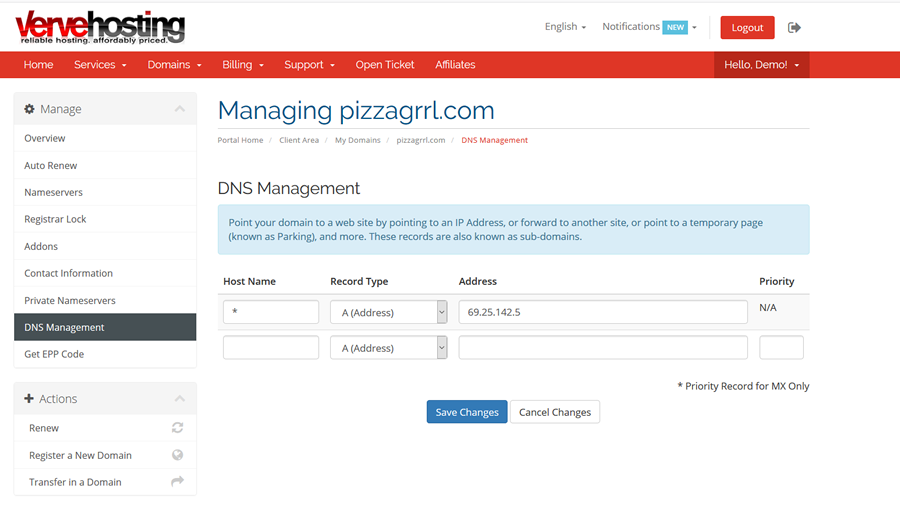
5. Select DNS Management from the menu on the left side of the screen to enter DNS records.