How to create a MySQL database in cPanel Print

  • 0

Here's a WHMCS-style knowledgebase article suitable for hosting providers and cPanel users.

How to Create a MySQL Database in cPanel

Introduction

Many web applications, including WordPress, Joomla, Drupal, and other content management systems, require a MySQL database to store website content, user information, and application settings.

This guide will walk you through creating a MySQL database, creating a database user, and assigning the user to the database in cPanel.

Step 1: Log in to cPanel

Begin by logging in to your cPanel account using the login URL provided by your hosting provider.

Once logged in, navigate to the Databases section.

Step 2: Open MySQL® Databases

In the Databases section, click MySQL® Databases.

This interface allows you to create and manage databases, users, and database permissions.

Step 3: Create a New Database

Under the Create New Database section:

  1. Enter a name for your database.

  2. Click Create Database.

You will see a confirmation message indicating that the database has been created successfully.

Important

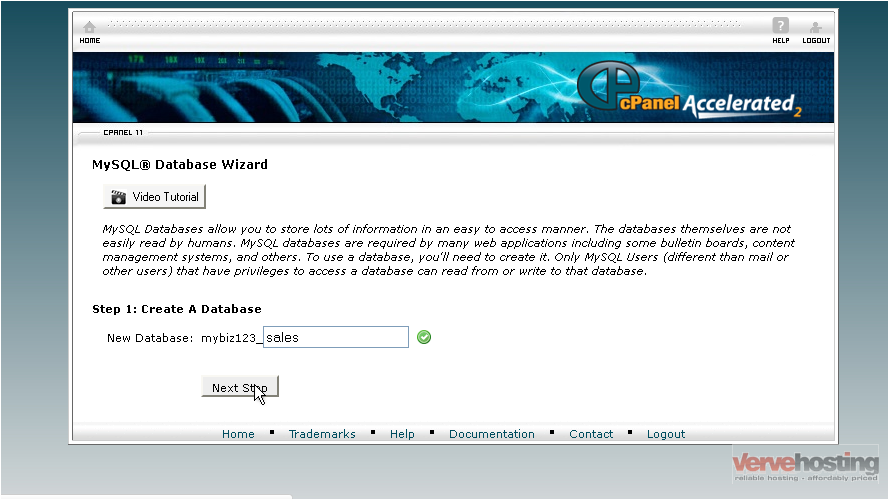
Most cPanel servers automatically prepend your cPanel username to the database name.

For example:

  • Database name entered: website

  • Actual database name: cpuser_website

Be sure to make note of the full database name, as you will need it when configuring your application.

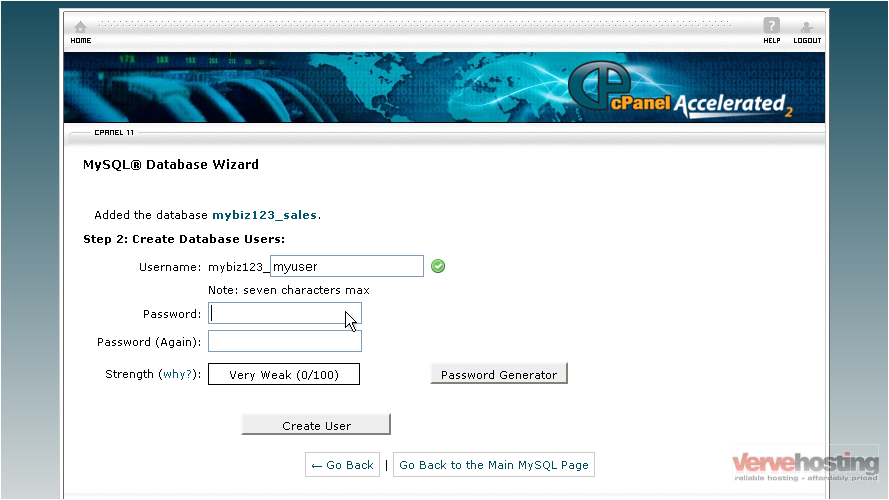
Step 4: Create a Database User

Return to the MySQL Databases page and locate the MySQL Users section.

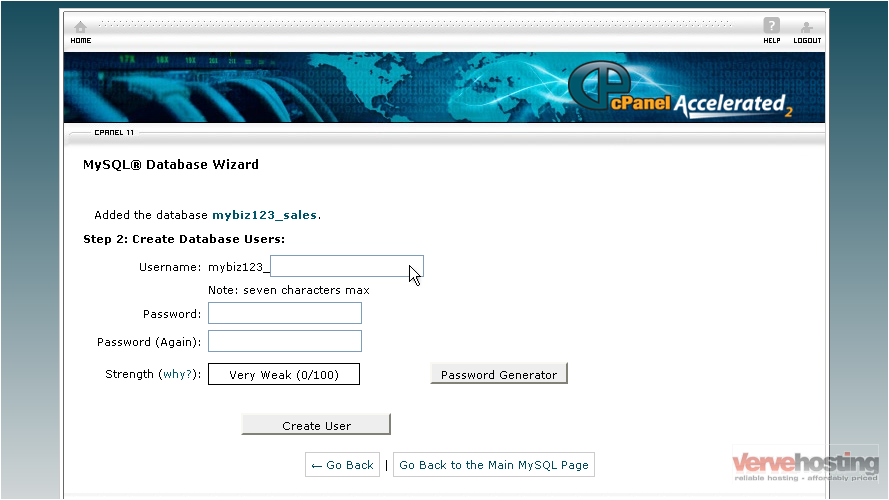
  1. Enter a username for the new database user.

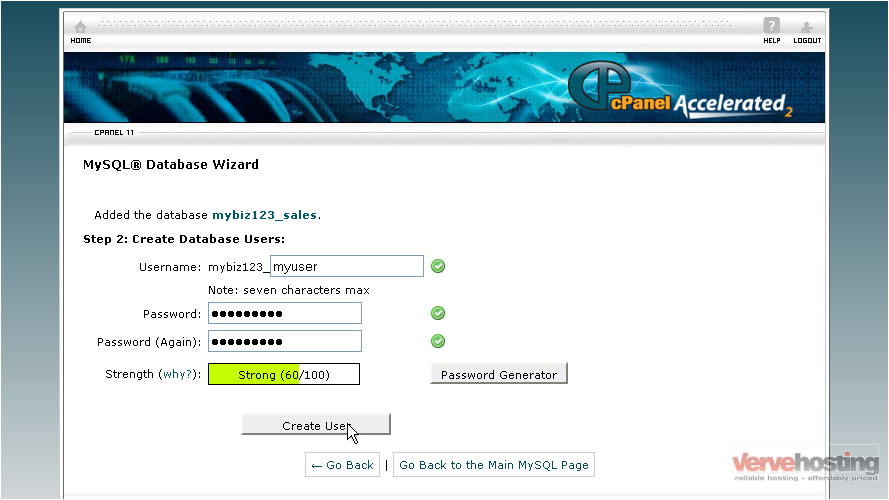
  2. Enter a strong password.

  3. Confirm the password.

  4. Click Create User.

Password Recommendations

Use a strong password that includes:

  • Uppercase letters

  • Lowercase letters

  • Numbers

  • Special characters

You may also use the Password Generator provided by cPanel.

Step 5: Add the User to the Database

After creating the database and user, they must be linked together.

Under the Add User To Database section:

  1. Select the database user from the User dropdown menu.

  2. Select the database from the Database dropdown menu.

  3. Click Add.

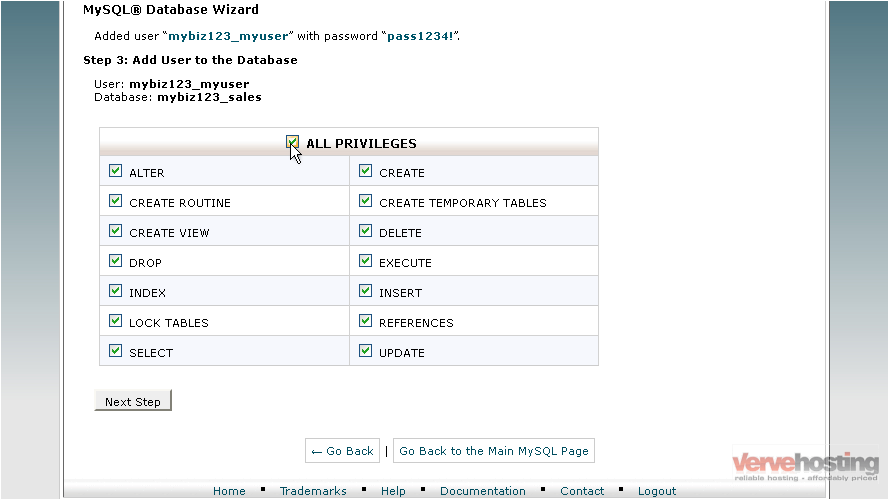
Step 6: Assign Database Privileges

You will be presented with a list of database privileges.

For most web applications, select:

ALL PRIVILEGES

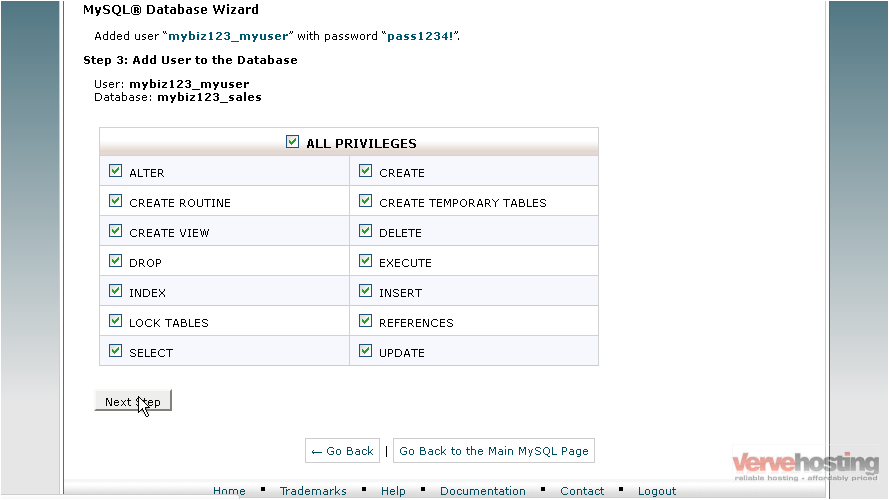
Click Make Changes to save the permissions.

The user will now have full access to the database.

Step 7: Verify the Database Configuration

Scroll to the Current Databases section.

Confirm that:

  • The database exists.

  • The database user is assigned.

  • The correct privileges are listed.

Your database is now ready to be used by your application.

Database Information You'll Need

Most applications will require the following information during installation:

Database Name

The full database name, including the cPanel username prefix.

Example:

cpuser_website

Database Username

The full database username, including the cPanel username prefix.

Example:

cpuser_dbuser

Database Password

The password assigned to the database user.

Database Host

For most cPanel hosting accounts, the database host is:

localhost

If your hosting provider uses a different database host, consult their documentation or contact support.

Common Issues

Access Denied Errors

If you receive an "Access Denied" error, verify that:

  • The database username is correct.

  • The database password is correct.

  • The user has been added to the database.

  • The appropriate privileges have been assigned.

Database Connection Errors

Ensure that:

  • The database name is entered correctly.

  • The database user is assigned to the database.

  • The database host is correct.

  • The password is accurate.

Missing Database Prefix

A common issue is forgetting to include the cPanel username prefix when entering database credentials into an application.

Always use the full database name and username displayed within cPanel.

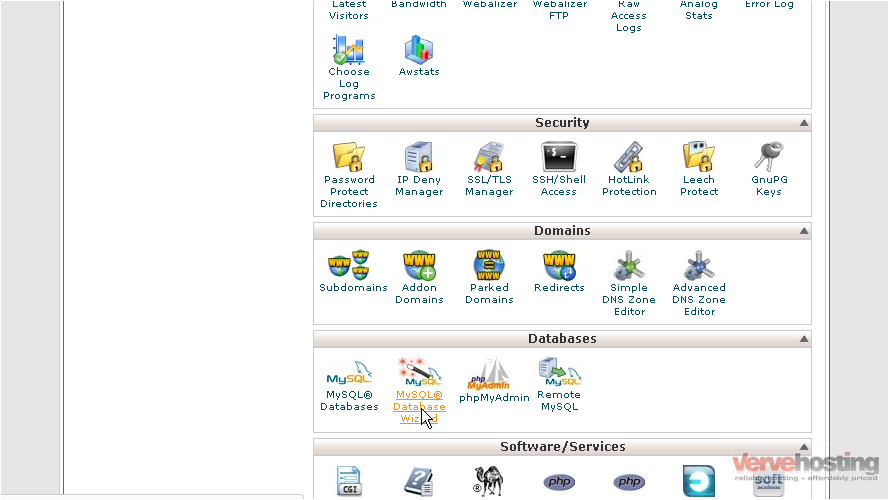
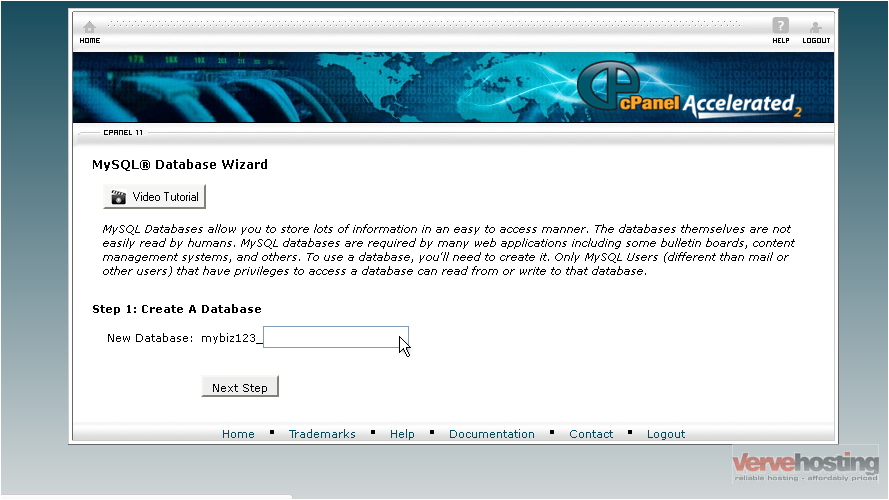
Alternative: MySQL Database Wizard

Some versions of cPanel include the MySQL Database Wizard.

This tool guides you through the entire process by:

  1. Creating a database.

  2. Creating a database user.

  3. Assigning the user to the database.

  4. Setting permissions.

The result is the same, but the wizard simplifies the setup process.

Conclusion

Creating a MySQL database in cPanel involves four simple steps:

  1. Create the database.

  2. Create a database user.

  3. Assign the user to the database.

  4. Grant the necessary privileges.

Once completed, you can use the database with WordPress, Joomla, Drupal, custom PHP applications, and many other web-based software packages.

Tip: When installing software such as WordPress, keep a record of the database name, username, and password in a secure location. These details are often required later for troubleshooting, migrations, and application updates.


Was this answer helpful?

« Back