This tutorial will show you how to crop an image in Photoshop
This tutorial assumes you already have your image open in Photoshop
1) Select the crop tool
2) Now, click and drag diagonally to create a box around your selection
3) Now that we have our box, we can click and drag the borders to resize it
4) Once you are happy with your selection, press the Enter key to commit your changes
Our image has now been cropped
Now, we will go back to our original image and learn how to crop using the marquee tools
5) Right click the marquee tool
6) Select the Rectangular Marquee Tool
The Single Row and Column Marquee Tools can be used in the same way as the Rectangular Marquee Tool
7) Now, click and drag diagonally to create a box like we did with the crop tool
8) Now that we have our selection, we will go to the image menu
Note that we cannot resize these borders like what we did with the crop tool
9) Select Crop
Now that we have our cropped image, we’ll get rid of the marquee around the border
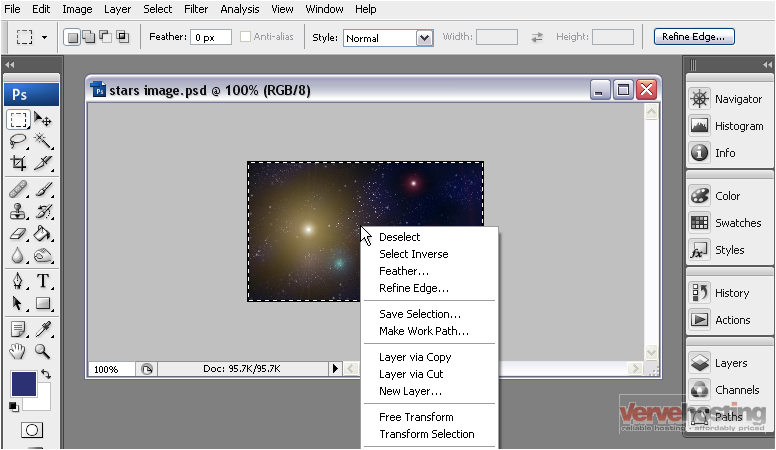
10) Right click anywhere on the image
11) Click Deselect
Success! Our image is now cropped
Now we’ll go back to our original image and learn how to crop in a circle
12) Right click on the Marquee tool
13) Select the Elliptical Marquee Tool
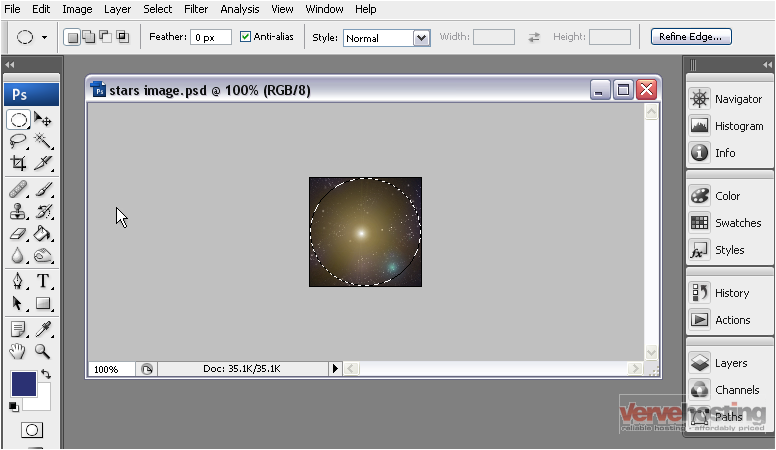
14) Now, click and drag diagonally just like before to create a selection
Note that you can hold down the Shift key while dragging to create a perfect circle
15) Now, we’ll go to the Image menu
16) Select Crop
Photoshop only crops to squares so we’ll need to get rid of the remaining part outside of the selected circle
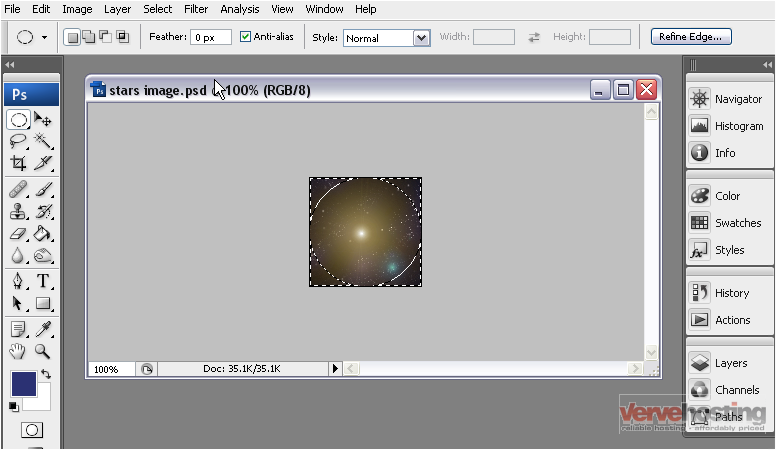
17) With the circle still selected, go to the Select menu
18) Click Inverse
Note that there’s now a dotted line around the border as well
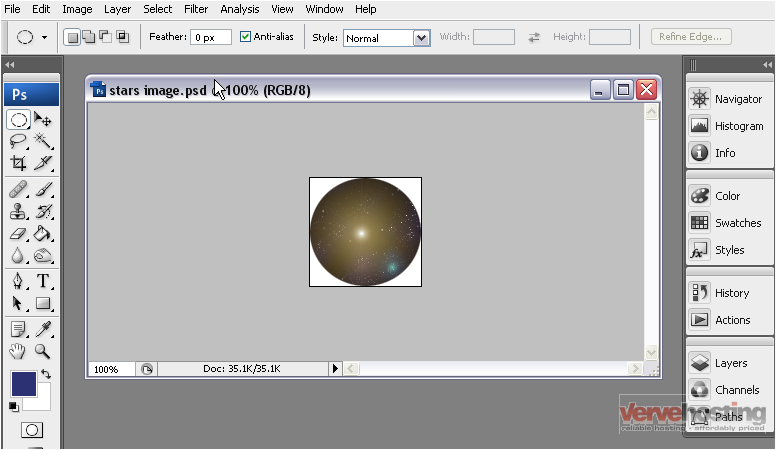
19) Press the Delete key
Another way to deselect the border is to press CTRL + D
That’s it! Our image is now cropped
This is the end of the tutorial. You now know how to crop an image in Photoshop using the Crop and Marquee Tools

